
The Creature Showcase
Group Project
Bournemouth University
Unreal Engine | Cinematic | Technical Artist | Blueprints | PCG | Proceduralism | Material Graphs
About
During my time pursuing an MSc in Computer Animation and Visual Effects at Bournemouth University, I collaborated with a team of five to develop the 'The Creature Showcase' project.
This project was to design a creature and display it exploring its natural habitat using UE5 as our render engine.
The creature we ended up choosing was a mix between an Axolotl and a Hippopotamus.
My Role as a UE Technical Artist
As a Tech Artist, I was able to bridge the gap between the artist and development side of the project.
Prototyping
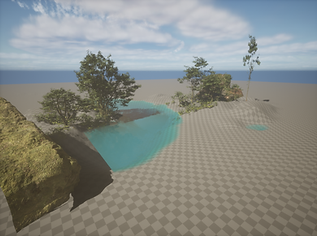
During the initial stages of the project, I used the Unreal Engine toolset to quickly prototype and create the rough level/forest environment to make it easier for the artists to visualise the ground and environment for their animations.
Pipeline and Workflow
I used the Alembic animations from Maya and fbx files for the assets to correctly set them up in the forest scene with the correct scale make them look as close as possible to the ones in the other tools and make them match up with the environment as well. As projects progress, assets may need updates or revisions, which involve going back to Maya for modifications and then re-exporting to Unreal Engine which I did a couple of times.
Level Layout and Proceduralism
For most parts of the forest, I used the “Procedural Foliage Volume” and static mesh foliage assets. Procedural foliage volume is a tool in Unreal Engine which uses algorithms and rules to generate foliage dynamically within a specified volume in a game world. This method allows for the creation of rich, varied, and expansive vegetation areas without the need for manually placing each plant or tree. Based on each shot's requirement I was able to quickly adjust the trees, grass, rocks and other forest assets by making changes to each Procedural foliage volume and the static mesh volume assets and modifying properties like seed, collision radius, density of static mesh per area etc. This also saved me time in placing our custom assets around the scene and hence made the whole level design process quick and efficient.
Procedural Content Generation Framework allows us to create a graph with specifics that allow flexible parameters to generate an environment of our choice. I used this to create certain parts of the forest with certain curves and slopes which is a disadvantage in the previous method. This also allowed me to create area-wise generation of static meshes.
Final Result of Level Design using Procedural Generation:


My Role as a Look-Dev Artist
VFX and Material Graphs and Niagara System
I used UE5’s blueprints and material graphs to create shaders.
Water Material Shader - I used the material editor to achieve dynamic and visually appealing water effects. I created the material in such a way so that I would be able to adjust the normals, colour, speed of water, and also the ripple effect around a static mesh. Making these accessible as parameters even allowed me to animate them in the shots according to the requirement.
Created Dust and Bird Particle System with Niagara
Lighting Tests
I used the Alembic animations from Maya and fbx files for the assets to correctly set them up in the forest scene with the correct scale make them look as close as possible to the ones in the other tools and make them match up with the environment as well. As projects progress, assets may need updates or revisions, which involve going back to Maya for modifications and then re-exporting to Unreal Engine which I did a couple of times.
Optimised Renders
I enabled UE5’s Nanite technology on only those assets which were in the foreground of the shots to give them the most realistic look while background static meshes were kept with comparatively low poly count to optimize the render. I did multiple renders of the same shot with different settings to get the most optimal and realistic look rendered out.Some of the console variable values that I used before rendering are :
r.DepthOfFieldQuality 4
r.ScreenPercentage 125
r.MotionBlurQuality 4
r.ShadowQuality 5
r.RayTracing.Global illumination.ScreenPercentage 50


Some Lighting Shots from the Cinematics


